
Hey, crafty friends! 🎒 I know how it goes — back to school sneaks up on you, and suddenly you've got a weekend left to pull together something special for the kids or the classroom. Good news: you don't need a whole week of crafting to make something memorable. Both of the projects I'm sharing today can realistically be cut, assembled, and ready to gift in one afternoon.
Here's my game plan for a productive (but relaxed!) back-to-school crafting session.
Project 1: Worm Candy Holder
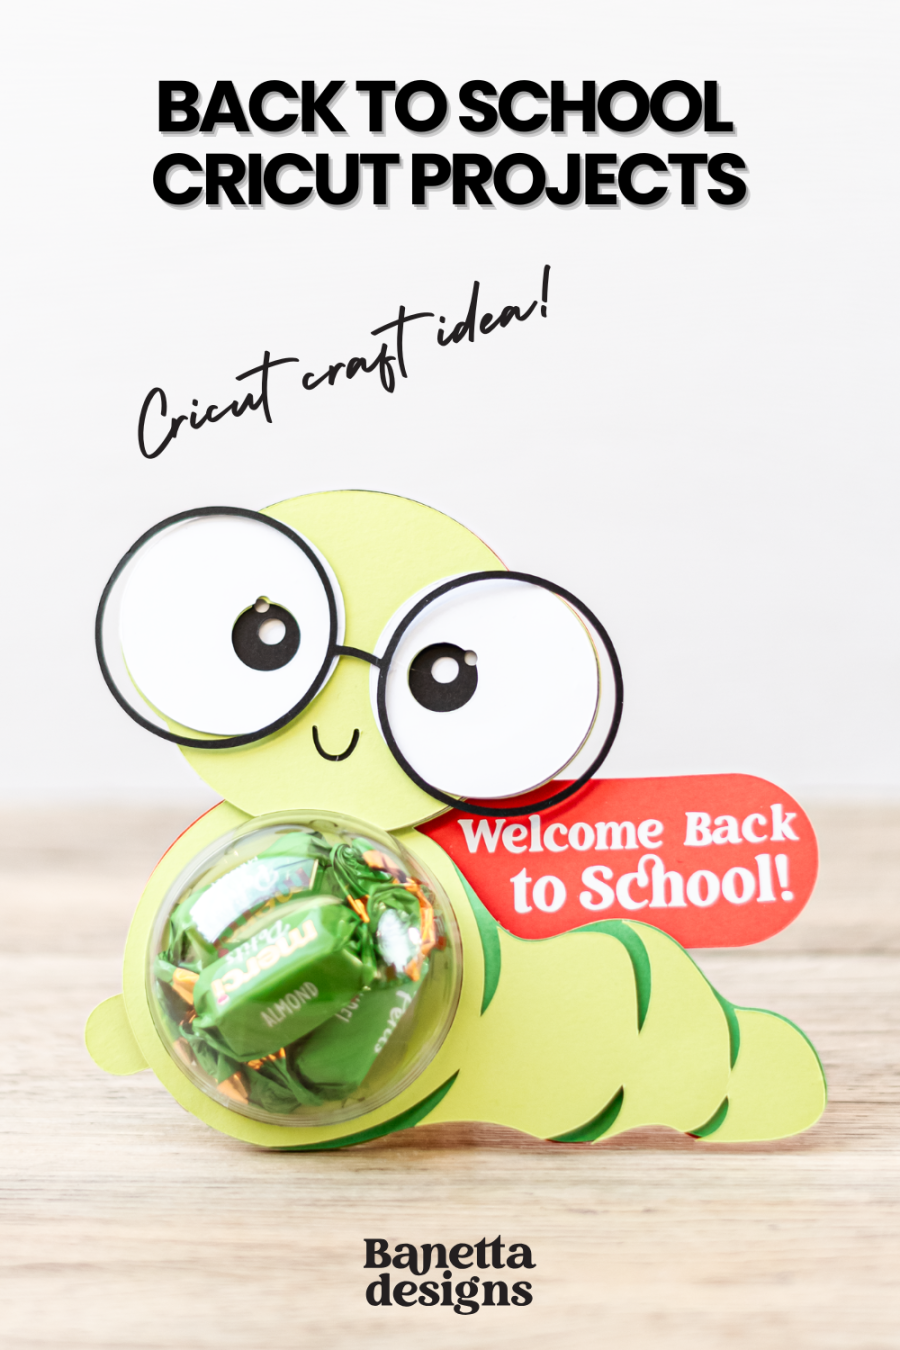

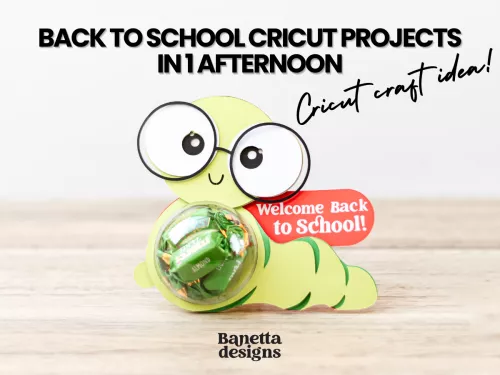
If you want a treat that gets an actual reaction out of kids, start here. My Worm Candy Holder is exactly what it sounds like — a cheeky, bespectacled little worm holding a clear bubble of candy, with a "Welcome Back to School!" sign attached. It's silly, it's charming, and it's become one of my most-loved designs for exactly that reason.
Why it fits into an afternoon:
- You can batch-cut multiple worms at once
- Two video tutorials are included — one for general assembly, one specifically walking through the opening mechanism, so there's no guesswork
- No specialty tools needed beyond your cutting machine, cardstock, and a dome ornament
Timing tip: Once your pieces are cut, assembly is quick. Very doable to make a small batch in an afternoon.
Available in two sizes — Small (13.7 x 12.6 cm / 5.39 x 4.94 in) and Large (18.3 x 16.8 cm / 7.20 x 6.61 in) — and designed to fit a 6cm or 8cm dome ornament (not included).
Project 2: ABC Back to School Treat Box
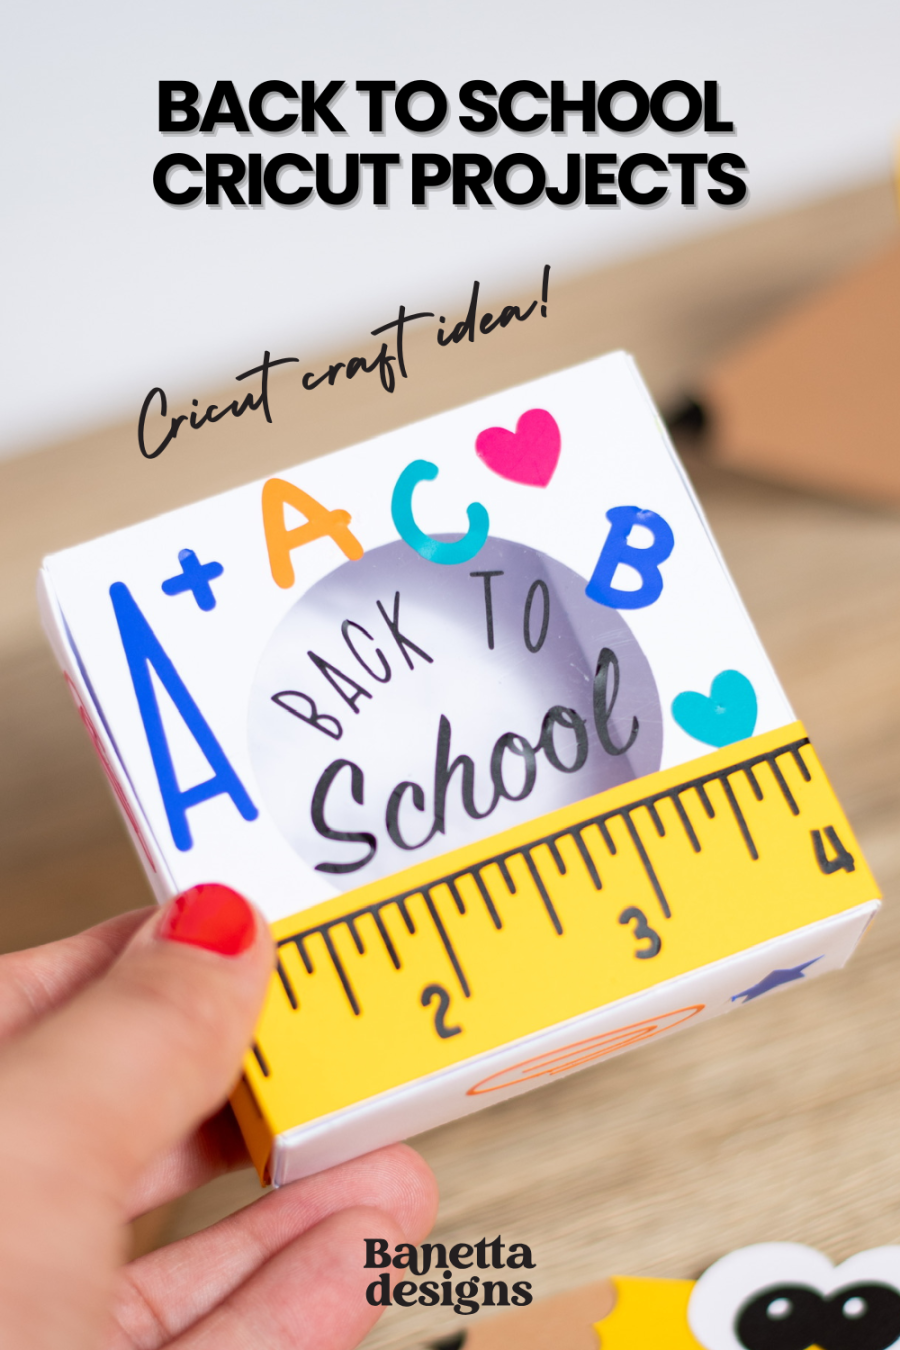
If your afternoon goal is a whole batch of treats for an entire class, the ABC Back to School Treat Box is built for exactly that. It's a square favor box decorated with colorful ABC letters, hearts, and a playful ruler graphic along the bottom — a design that reads "classroom celebration" the second you see it.
Why it fits into an afternoon:
- The square shape and simple fold structure make this one of the faster boxes to assemble
- Ungrouped pieces mean you can easily batch-cut a whole set in your favorite color palette
- A video tutorial is included to guide you through folding and assembly
Finished size is approximately 8.3 x 8.3 x 2.9 cm (3.27 x 3.27 x 1.14 in) — just right for candy, stickers, or small trinkets. Note: an acetate sheet for the window isn't included, so grab one separately if you want that clear-window look.
How to Structure Your Afternoon
If you want to knock out both projects in one sitting, here's a simple flow that works well:
- Prep: Download your files, unzip them, and load up your cardstock colors
- Cut: Cut all your pieces for both projects — batch by color to save time swapping mats
- Assemble: Fold, glue, and build your treat boxes and candy holders
- Fill & finish: Add your candy, gift cards, or treats, and you're done!
That's roughly a 2–3 hour crafting session for a full batch of classroom treats plus something extra special — very doable for one afternoon, even with a coffee break in between.
If you make your own, I'd love to see it! Tag me or send me a photo — nothing makes my day more than seeing my designs come to life in your craft room.
You can grab the Cute Sun Candy Holder Treat Box SVG file over in my Etsy shop. You can find the video tutorial on my youtube channel!
Happy crafting! — Niki